How To Quickly Build A Survival Oven Using Dirt, Water And Sticks...
Have you ever heard of a tandoor oven? No? Neither had I until right about 2009. I was deployed to Afghanistan and found myself constantly eating this delicious local bread, cooked in the local’s ovens. But this wasn’t a place that had modern infrastructure or even electricity, so I use the term “oven” a little loosely. These were what we originally called “mud ovens,” and on occasion we found ourselves warming our hands and feet near one.
It was probably a good three or four months before we actually learned the name of these neat little ovens. After a lot of broken English/Afghan conversations, the local Afghan National Army soldier we worked with became quite friendly and our go-to local national soldier. He eventually corrected our terminology from “mud oven” to “tandoor.”
My squad, our company’s recon squad, was pushed to a northern outpost where we could control the middle ground of our region. We set up in an abandoned compound and eventually built our defenses and turned our little home into a fortress.
The Most Versatile Backup Stove In The World Allows You To Cook Anything, Any Time, Any Where
We worked hard, and patrolled hard, and that creates hunger. We got real tired of MREs, and could trade different items, or buy chickens, eggs and goats. Our local Afghan soldiers were more than happy to show us how to cook the food; we just needed a method to cook the food. The first option was fire, but tactically that had a number of disadvantages. First off, it would light up our inner compound for anyone who wanted to take a peak; secondly, the use of night vision for security was critical, and the fire would limit it.
So eventually we decided: Let’s build a tandoor. The Afghan soldier knew how to do it, and it was easy to get mud from a nearby canal. We knew ours wouldn’t be as pretty as the local’s, but we could build one. We did, and it worked excellently.
So what’s the point of this story? What can a tandoor do for survivalists in America? Well, it’s an easy-to-build oven, it can provide a low-light option for cooking, and it’s highly efficient. They can be built nearly anywhere you can find dirt, water and sticks.
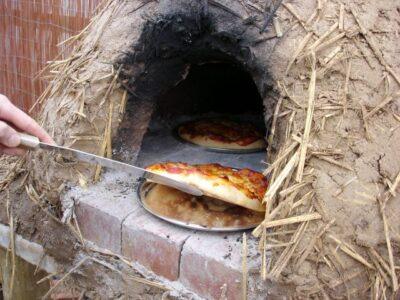
A tandoor requires four materials: dirt, water, some sticks, and a flat piece of metal. Optionally, you can add sand and hay to increase the strength. A shovel also makes it much easier to mix up the mud, but it can be done with hands if you aren’t afraid of getting dirty.
Step 1. Find some dirt and water. To be honest, clay works best, but dirt will work. Start making mud; you’ll find yourself feeling like a little kid making mud pies again. I had my son helping me and he had an absolute ball playing in the mud.
A shovel helps quite a bit, too. Let the water soak in and make nice and thick cement. At this point you can add a bit of sand and hay – if you wish — to make mud brick. Mud brick has been used across the world as a foundation for homes, walls and entire palaces.
Step 2. Next, build a horseshoe out of mud. This is your foundation for the oven. The foundation needs to be about six inches thick and about nine inches high and capable of holding whatever you plan on cooking. On this foundation you are going to install your flat piece of metal. The grill needs to be over the legs of the U-shaped horseshoe. Use some mud to secure the grill.
An Amazing Breakthrough In Compact Portable Backup Power — Easily Fits In Your Pocket Or Backpack!
Step 3. Next, gather some sticks. Each one needs to be about the same size. Start leaning these sticks inward to form a leaning teepee. A little cordage makes it a bit easier for stability. These sticks are going to be the base of your tandoor and support most of the mud and do your heavy lifting, so make sure they’re strong.
Step 4. So now that your sticks are leaning together you need to start piling mud up at the bottom. Build a strong foundation around the base and keep building upwards. You should be forming a cone-shaped device, with the widest part of the cone on the bottom, attached to the foundation. Once you get close to the top, don’t completely cover the sticks. This will form the chimney of the device.
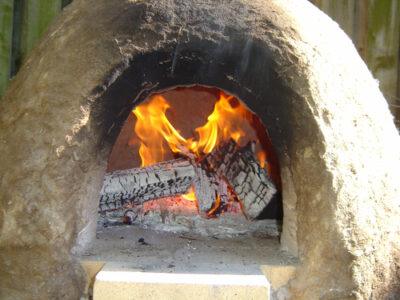
Step 5. Now that the cone and foundation is complete, stick some wood under the grill and into the base of the foundation. Start building the fire and letting it dry out the mud. This will allow the mud to dry and become a more solid brick-like material. After this, you can start cooking on the grill. The biggest threat to the amateur tandoor is rain, and we learned quickly a tarp was an excellent way to protect it.
Cooking on a tandoor is easy, and the grill will become quite hot, so be careful. We were able to cook everything from Ramen noodles in a canteen cup to this delicious Afghan recipe for red chicken. Throw that on some bread and … well, I’m getting distracted. The tandoor is an efficient method that offers multiple tactical advantages, and efficiency over the standard campfire style cooking.


No comments:
Post a Comment